Some Windows 10 users are complaining about a problem related to not discovering their computers on the same network they are working. If you also can’t discover the computers on your network, you can attempt these fixes. But before going for these fixes you should attempt these initial workarounds to solve your problem with minimal effort.
Initial Workarounds–
1. Restart your computer. After restarting check again if you can discover the computer on your network.
2. Try to check if you can discover the computer on the network from another computer. If you can access the computer on the same network, go for the fixes.
Fix-1 Turn SMB1 feature ON
Turning SMB1.0 feature ‘On’ on your computer will fix this issue,.
1. Press Windows key+R to open Run window.
2. In the Run window, type “optionalfeatures” and then hit Enter.
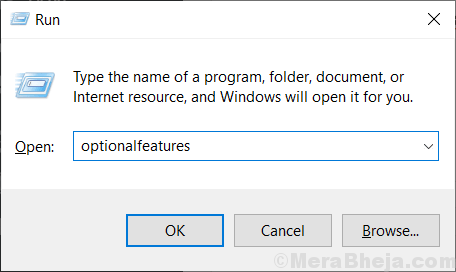
Windows Features window will be opened.
3. Scroll down through the Windows Features window and make sure “SMB 1.0/CIFS File Sharing Support” is checked.
4. Then, click on “OK” to save the changes on your computer.
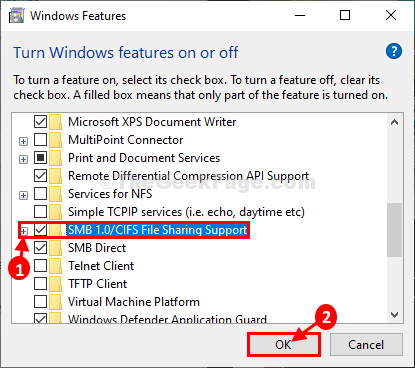
Wait for a while as Windows install this optional feature on your computer.
4. Now, click on “Restart now…” to restart your computer in order to save the changes.
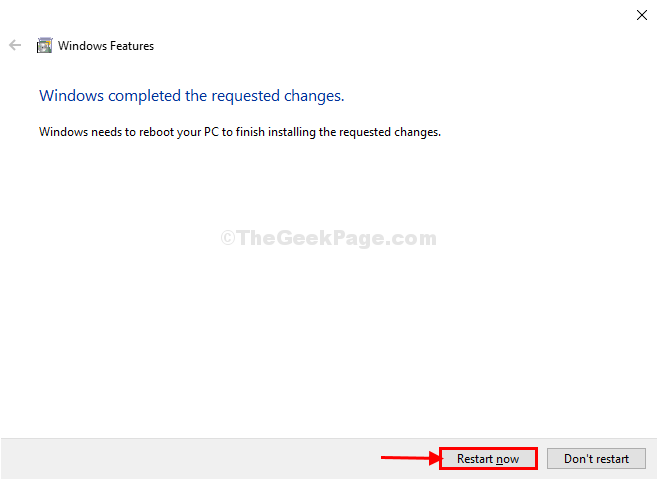
After restarting your computer check if you can detect other computers on your network or not.
Fix-2 Change Startup type of FDRS
1. Press Windows key and ‘S‘ key. This will open the Search box. Type “services” in that.
2. Then, click on the “Services“.
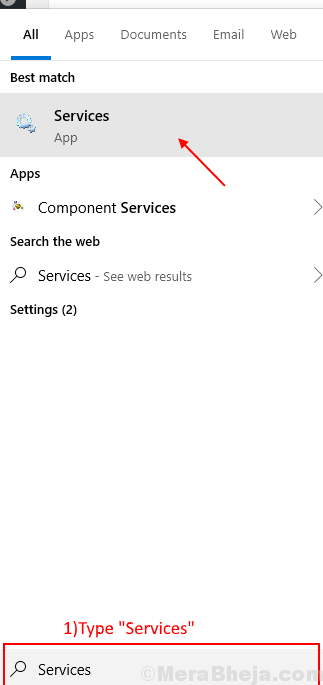
2. In the list of services, scroll down to find out “Function Discovery Resource Publication” and double click on it.
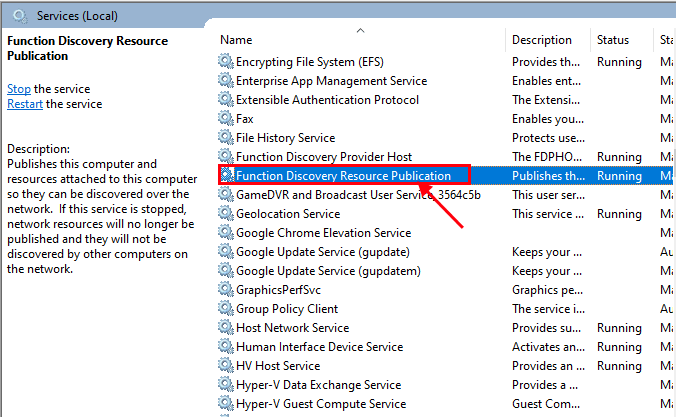
3. Now, in the Properties window, click on the drop-down beside the “Startup type:” and from the drop-down menu, choose “Automatic (Delayed Start)” and click on “Apply” and “OK“.
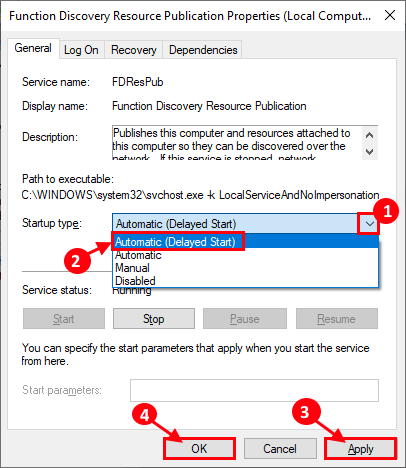
Close the Services window and reboot your computer. After rebooting your computer check if you can discover the computers on your network.
Fix-3 Change Private Network profile
[NOTE: It is recommended, that you should change this setting when you are on the ‘Private’ network only]
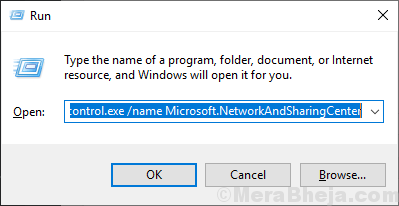
1. Press Windows key +R to launch Run, and copy and paste “control.exe /name Microsoft.NetworkAndSharingCenter” and hit Enter.
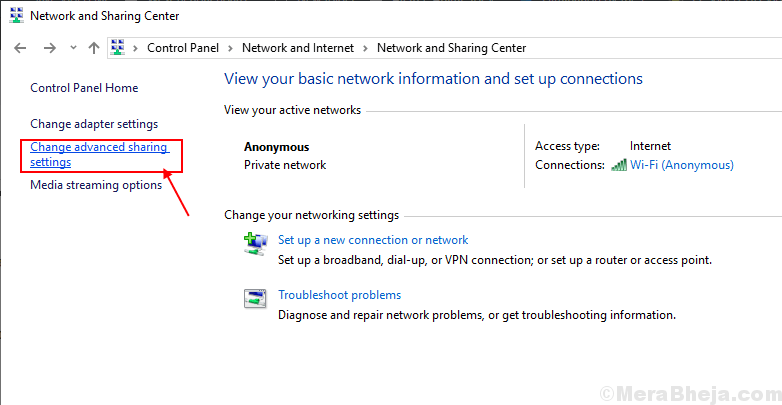
2. Now, on the left side click on “Change Advanced sharing“. It will open the Advanced sharing settings window.
3. Now, in this window click on “Turn on network discovery” and then click on “Turn on file and printer sharing“.
4. After this, click on “Save changes.
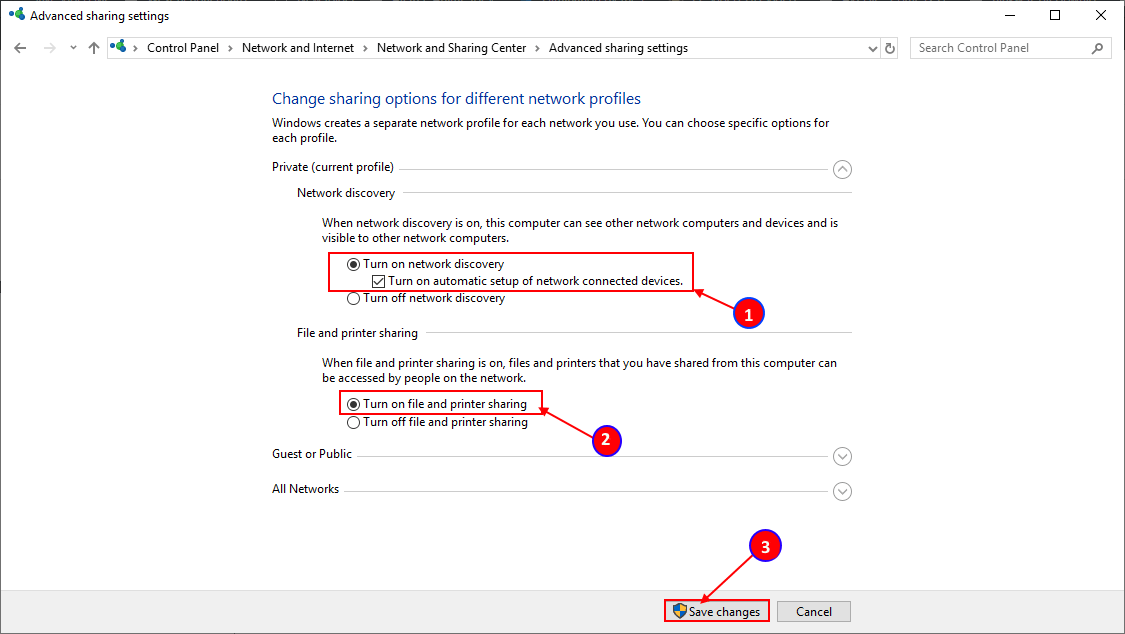
Close the Control panel window, and restart your computer.
Fix-4 Change the settings of All network profile-
1. Press Windows key +R to open Run.
2. Then, all you need to do is copy-paste this line in Run and hit Enter key.
control.exe /name Microsoft.NetworkAndSharingCenter /page Advanced
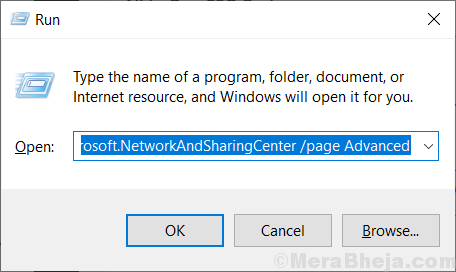
3. In Advanced Sharing settings window, click on “All Networks“.
4. Then, click on “Turn on sharing so anyone with network access can read and write files in the Public folders“.
5. In Password Protected sharing option, choose the option “Turn off password protected sharing“.
6. Finally, click on “Save Changes“.
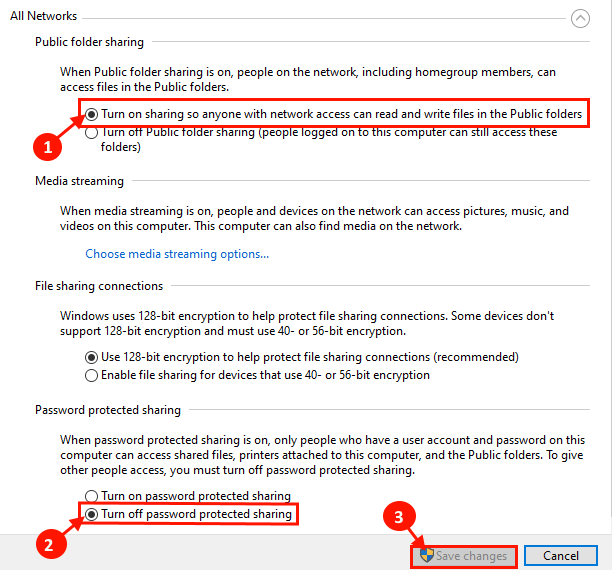
Close Advanced Sharing settings window.
Restart your computer.
Check if you can discover computers on your network.
Fix-5 Turn on Network discovery with Command Prompt-
1. At first, we have to open the Run window. You can do it by pressing the “Windows key+R” together.
2. Now, type “cmd” in the Run terminal and then click on “OK“.

3. Now, copy and paste this command in Command Prompt window, and hit Enter.
netsh advfirewall firewall set rule group="Network Discovery" new enable=Yes

You should be able to discover the computer on your network.
Fix-6 Join a network from System Properties-
1.Press Windows Key+R to launch Run, and copy-paste this command and hit Enter. System Properties window will open.
sysdm.cpl SystemProperties
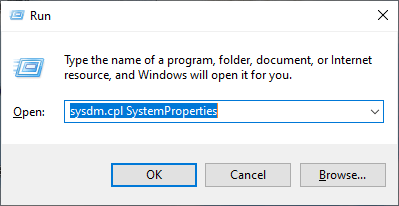
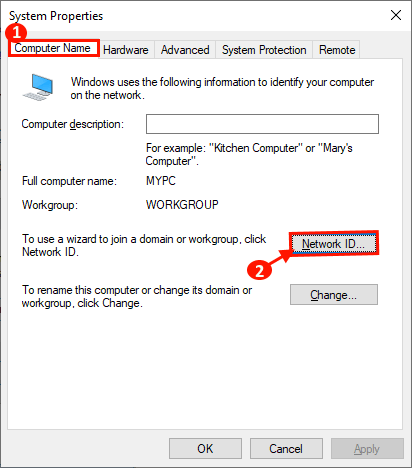
2. In the System Properties window, choose “Computer Name” and click on “Network ID…“.
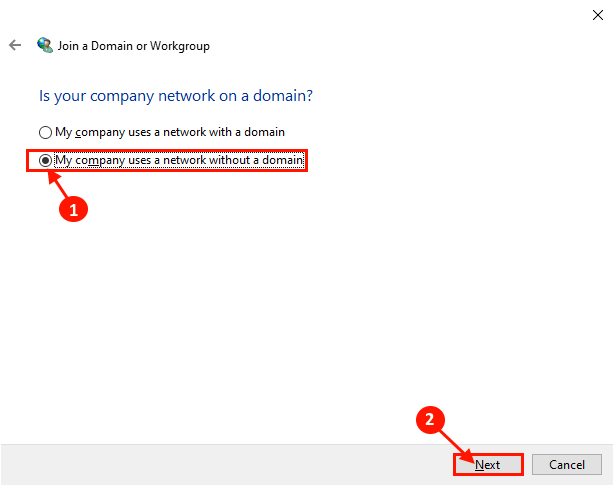
3. Now, choose “This computer is part of a business network: I use it to connect to another computer at work” and click on “Next“.
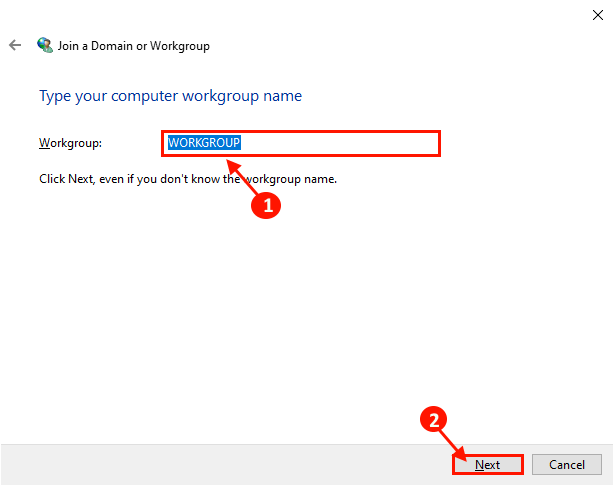
4. Now, enter the name of the Workgroup in the box beside the “WORKGROUP:“. Now, click on “Next” to complete the process.
Restart your computer.
You should be able to discover the computer on your network.
Fix-7 Reset the network on your computer-
1. Press Windows Key+I to open the Settings window, on your computer.
Now, click on “Network and Internet“.

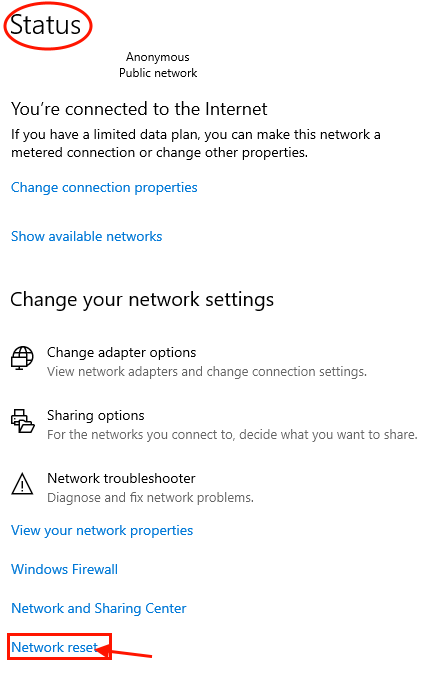
2. Now, under Status, on the left hand side, scroll down and click on “Network reset“.
Restart your computer and after rebooting, check if you can discover the computers on your network or not.
Fix-8 Reset the network from Command Prompt-
1. You have to press the ‘Windows key‘. Now, simply type “cmd“.
2. Right-click on “Command Prompt” which has appeared in the search results, and then click on “Run as administrator“.
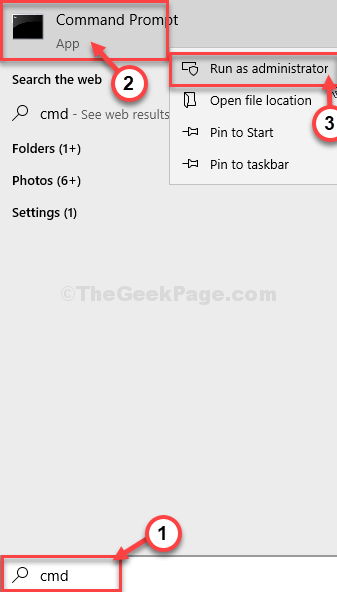
3. Once you have opened the Command Prompt window, type or copy-paste these commands and hit Enter after pasting each of them.
netsh int ip reset reset.txt
netsh winsock reset
netsh advfirewall reset

Don’t forget to reboot your computer and after rebooting you should be able to discover the computers on your network.
If you are facing this issue as you have received a recent major update for your Windows 10, you should attempt this fix on your computer.

No comments:
Post a Comment