Sometimes we want to connect headphones to our Desktop/Laptop and enjoy our favorite movie but if headphones don’t give any sound you will definitely get annoyed.
Many users are facing this problem on their Windows 10 computer. But don’t worry, We will help you to recover from this issue, just follow below solutions you will able to use your headphones.
But before troubleshooting, check that you don’t have any hardware issue. Most of the desktop has two headphone jacks if your desktop has another jack plug-in headphone and check that it is working or not. Also, check that your headphones are working or not by plugging it into another computer or smartphone. If you have hardware issues this methods will not work for you and you have to visit repair shop and get checked your computer.
Table of Contents
Fix 1 – Re-install Audio Driver
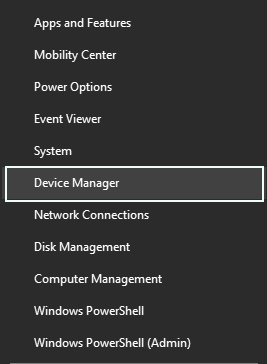
STEP 1 – Right Click on Windows button and Open Device Manager.
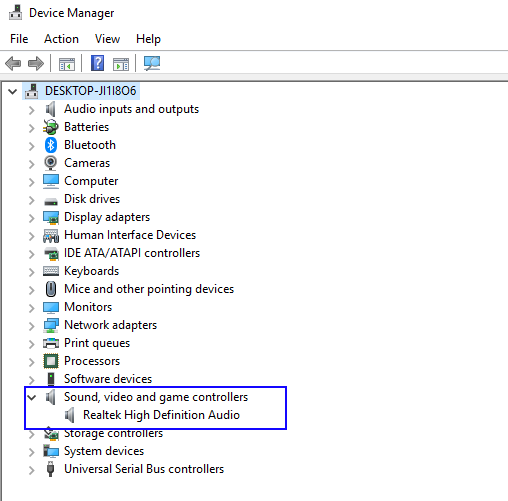
STEP 2 – It will open Device Manager window, find Sound, Video and game controllers from the list and Expand it.
STEP 3 – Right Click on your Audio Driver from the list and Click on Uninstall.
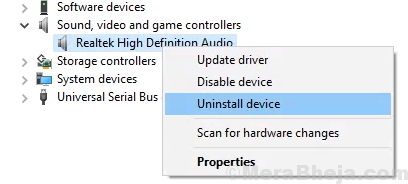
STEP 4 – Reboot your device after finishing the process. It will install your audio driver again and solve your problem.
Fix 2 – Enable Stereo Mix
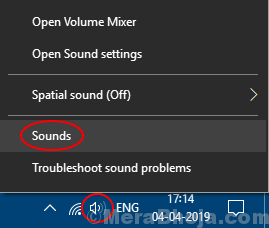
1. Right Click on Volume Icon on Taskbar
2. Click on Sounds.
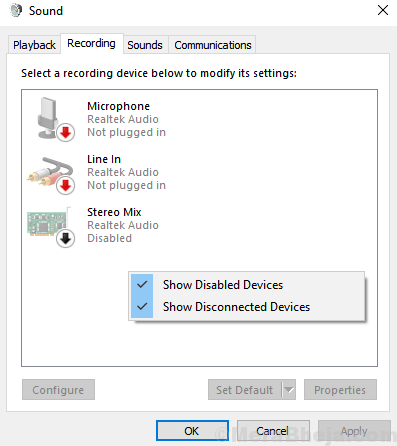
3. Now, Go to Recording Tab
4. Right Click on an Empty Blank area and Make sure that both “View Disabled Devices” and “View Disconnected Devices” options are checked.
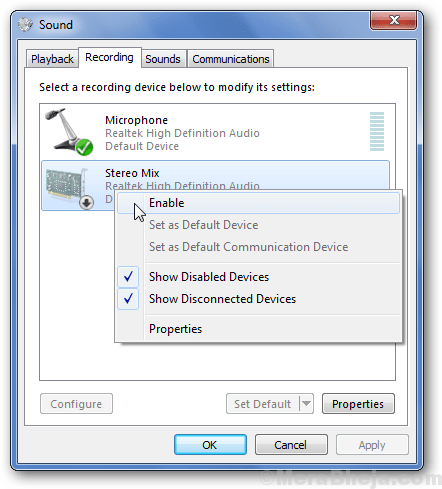
5. Now, Right Click and Enable Stereo Mix.
Fix 4 – Enable playback device from sound settings
STEP 1 – Open Control Panel . Choose large icons in View by Option.
Click on Sound .
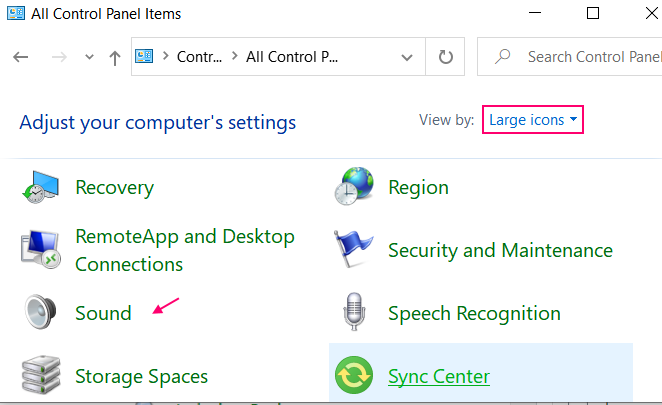
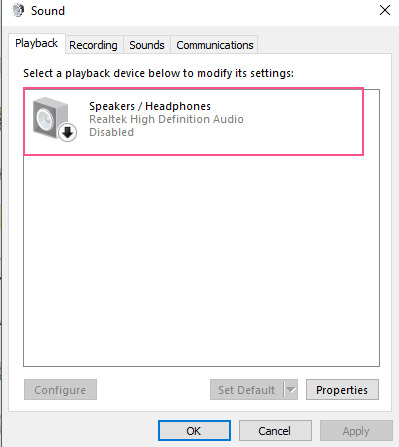
STEP 2 – You will see a list of playback devices available there. If your headphones are not showing in the list right click and check on Show Disabled Devices and Show Disconnected Devices.
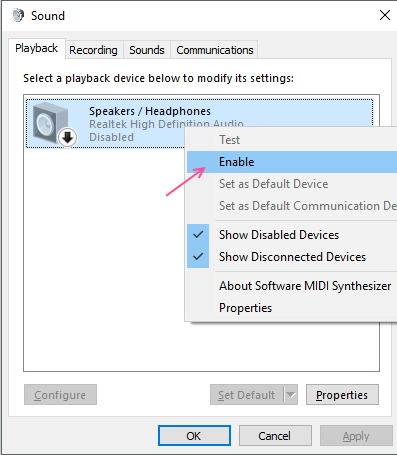
STEP 3 – Right click on Headphone and select Enable.
STEP 4 – Click OK.
This method will enable your Headphone and your headphone should work fine now.
Fix 5: Uninstall Realtek Sound Software
1. Search appwiz.cpl in windows 10 search box. Click on appwiz.cpl
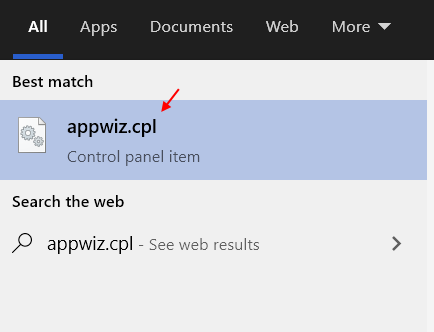
2. Now, Locate and uninstall Realtek HD Audio driver.

Fix 6 – Disable front panel jack detection
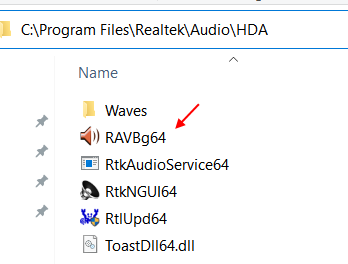
1. Go to the following path from the file explorer address bar. Just copy and paste the path in the address bar.
C:\Program Files\Realtek\Audio\HDA
2. Click on RAVBg64 to open Realtek HD audio manager.
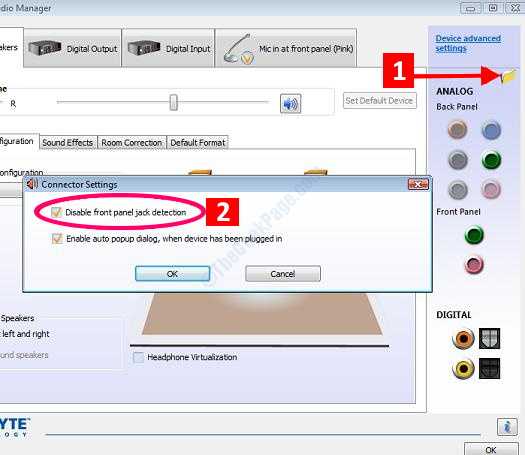
3. Now, click on the folder icon located at the top right.
4. Uncheck Disable Front panel jack selection.
Fix 7 – Disable front panel jack detection
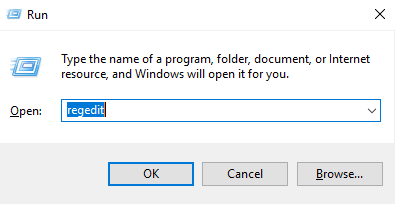
1. Press Windows Key + R.
2. Type regedit, press Enter.
3. Browse to following location in Registry Editor.
HKEY_LOCAL_MACHINE\SYSTEM\CurrentControlSet\Control\Class\{4D36E96C-E325-11CE-BFC1-08002BE10318}HKEY_LOCAL_MACHINE\SYSTEM\CurrentControlSet\Control\Class\{4D36E96C-E325-11CE-BFC1-08002BE10318}\0007\GlobalSettings07\GlobalSettings
If you can’t find the file in the path given above , try the path given below.
HKEY_LOCAL_MACHINE\SYSTEM\CurrentControlSet\Control\Class\{4D36E96C-E325-11CE-BFC1-08002BE10318}HKEY_LOCAL_MACHINE\SYSTEM\CurrentControlSet\Control\Class\{4D36E96C-E325-11CE-BFC1-08002BE10318}\0002\GlobalSettings02\GlobalSettings4. Right-click the EnableDynamicDevices, click on Modify.
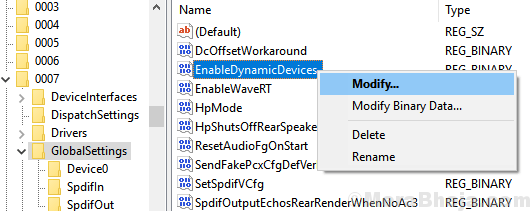
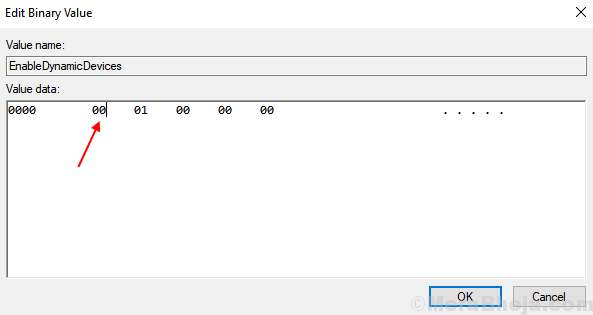
5. Change it to 0, Click on OK.
6. Restart your Computer.

No comments:
Post a Comment